
Billing Workflow User Guide
This guide covers the major responsibilities of the Rise Billing team including:
- Forensic Exam billing (Qualified Provider Invoice)
- Follow-Up Forensic Exam billing (Qualified Provider Invoice)
- Suspect Examination
1) Forensic Exam Billing
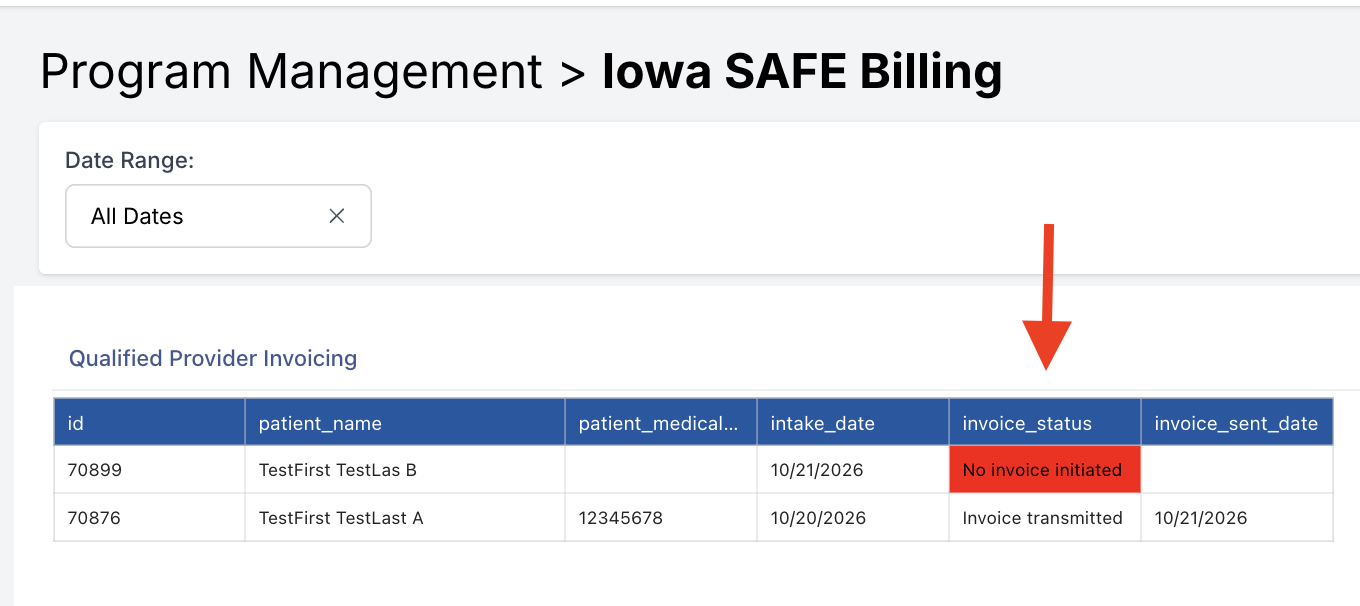
Step 1: Review the Billing Dashboard
Log into the Cordata Verity, and review the Billing Dashboard. Identify any cases that have not yet been invoiced. It may be helpful to leave this open as its own tab.
Step 2: Navigate to the Browse Reports View
Click "Browse Reports" to ensure that you are looking at the list of available reports.

Step 3: Find the Correct Report
Using the Search feature, find the appropriate intake form using either (1) the Patient's name, or (2) using the report ID.

Step 4: Find The Report Actions Menu
Locate the "..." on the right hand side of the Brows Reports table row and click to open the Actions Menu.

Step 5: Click "Copy to New Report"
Select "Copy to new report" which will pull information from the first report into a new report.

Step 6: Copy the Report
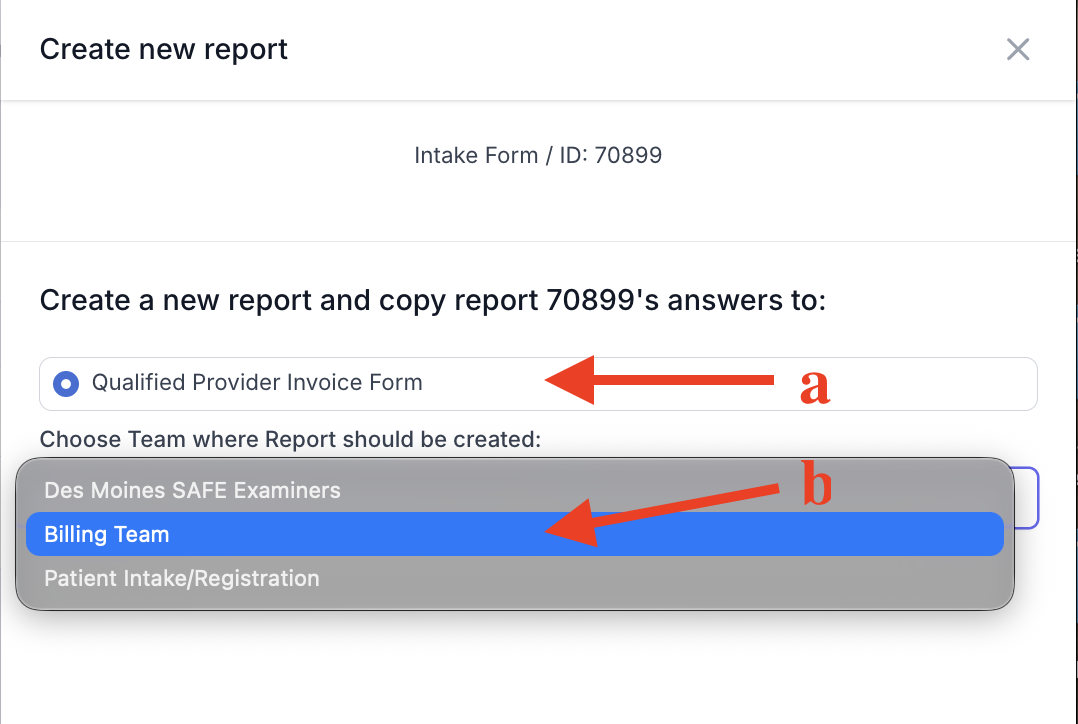
(a) Select the "Qualified Provider Invoice Form", and (b) for select "Billing Team" for where the Report should be created. Note that only members of this team will be able to see these reports.
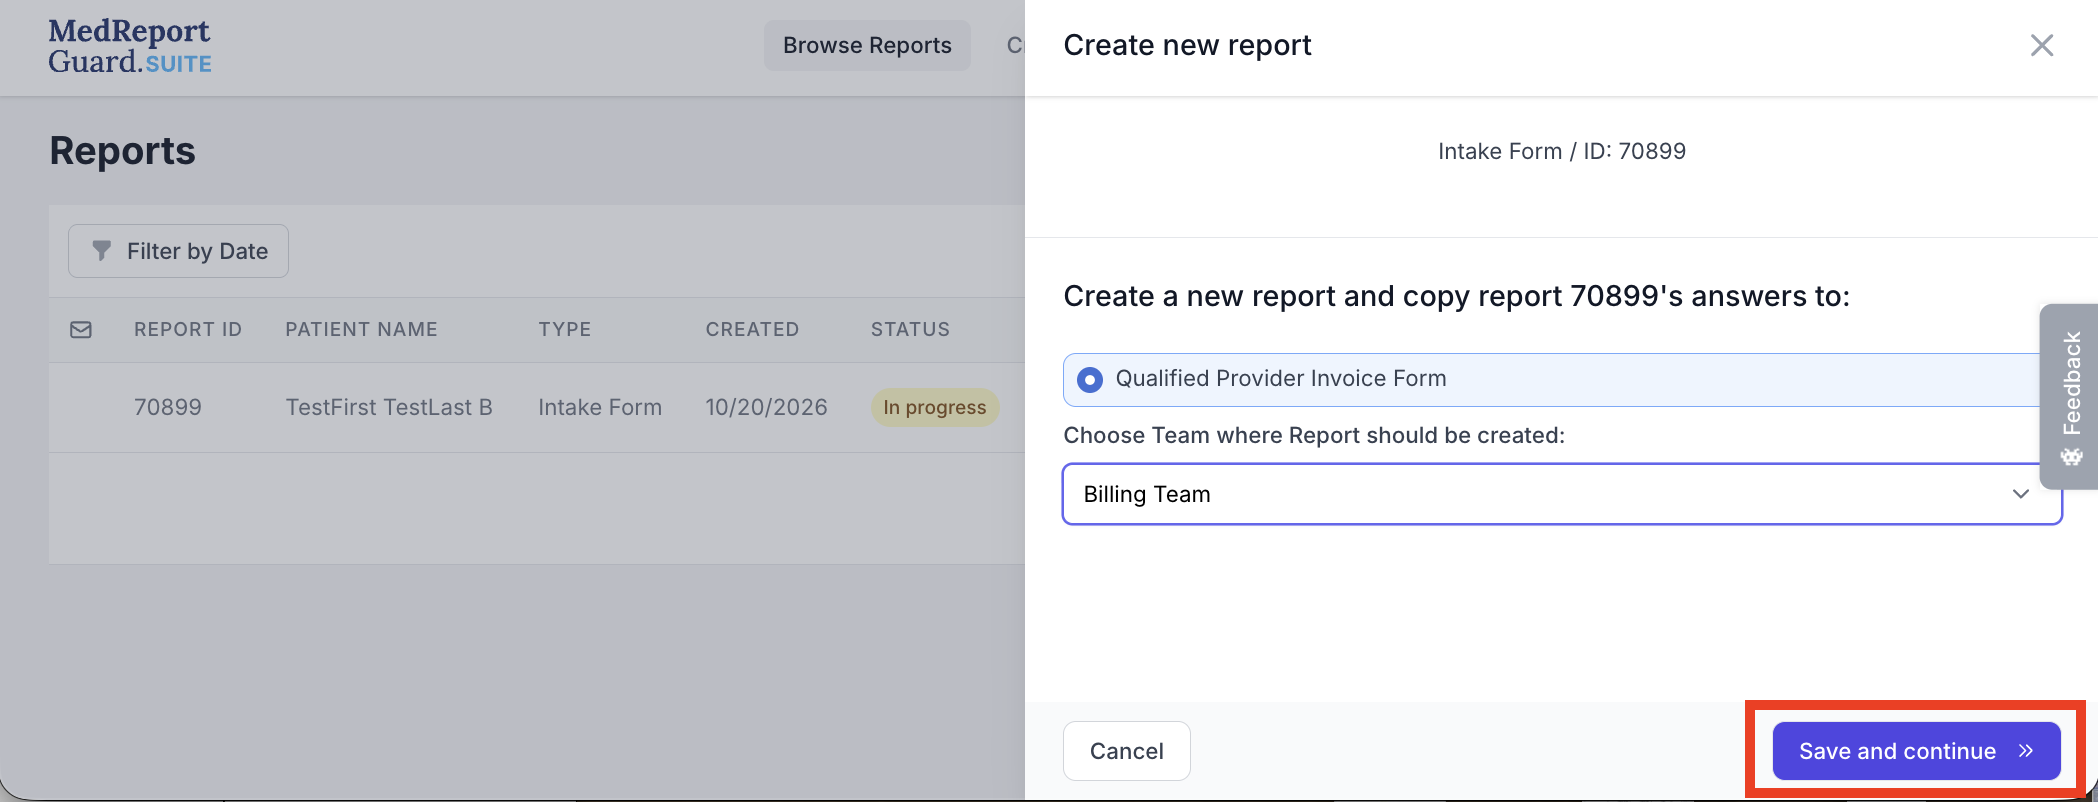
Next, click "Save and Continue" in the bottom right hand corner.
Step 7: Begin Editing the Provider Invoice
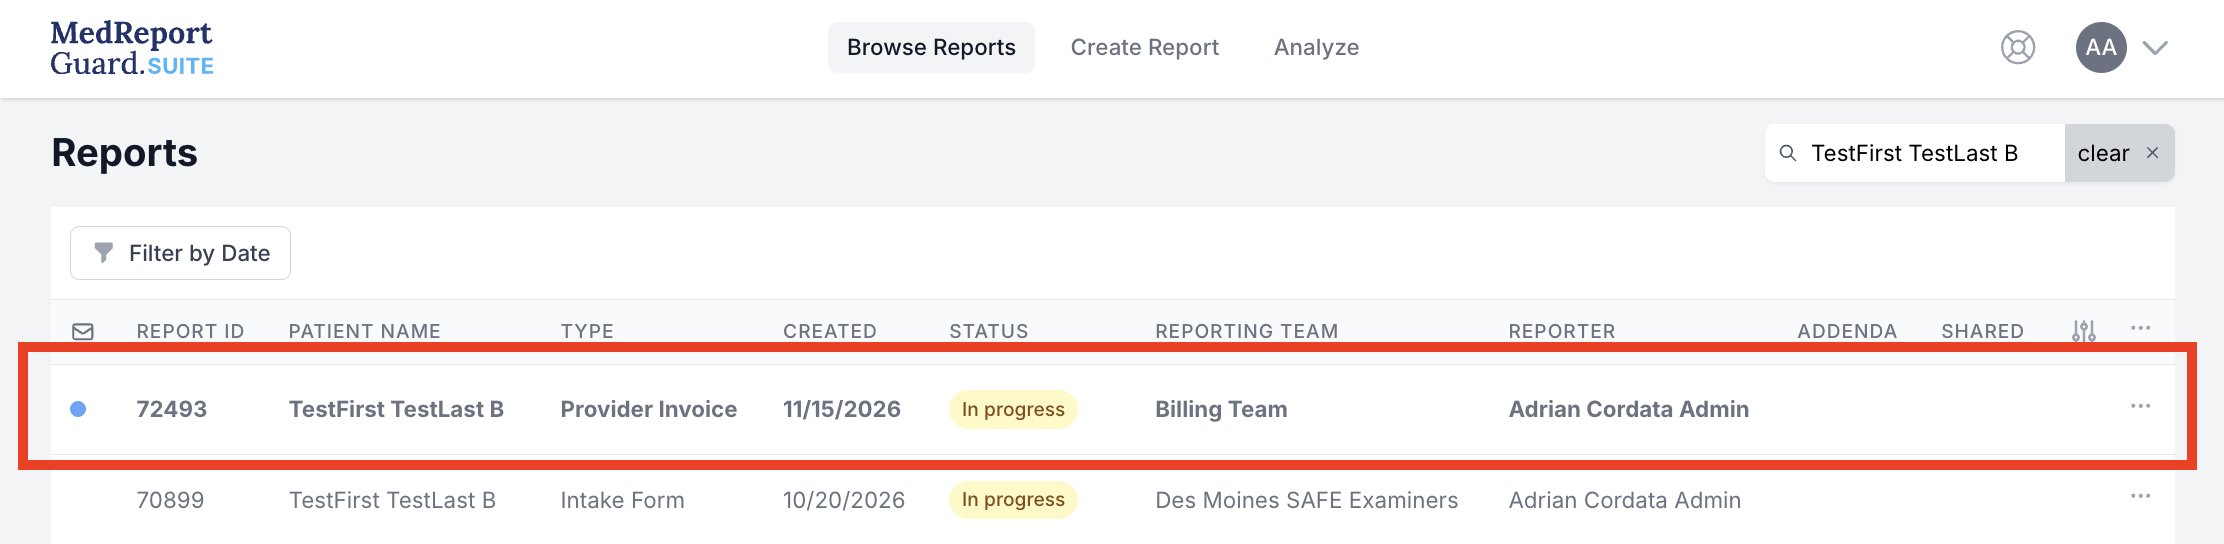
A new Provider Invoice form will have been generated, and made identifiable with a blue dot in the left-most column, and bold text in the table rows. Click anywhere on this row:
Open the invoice form to begin editing it:
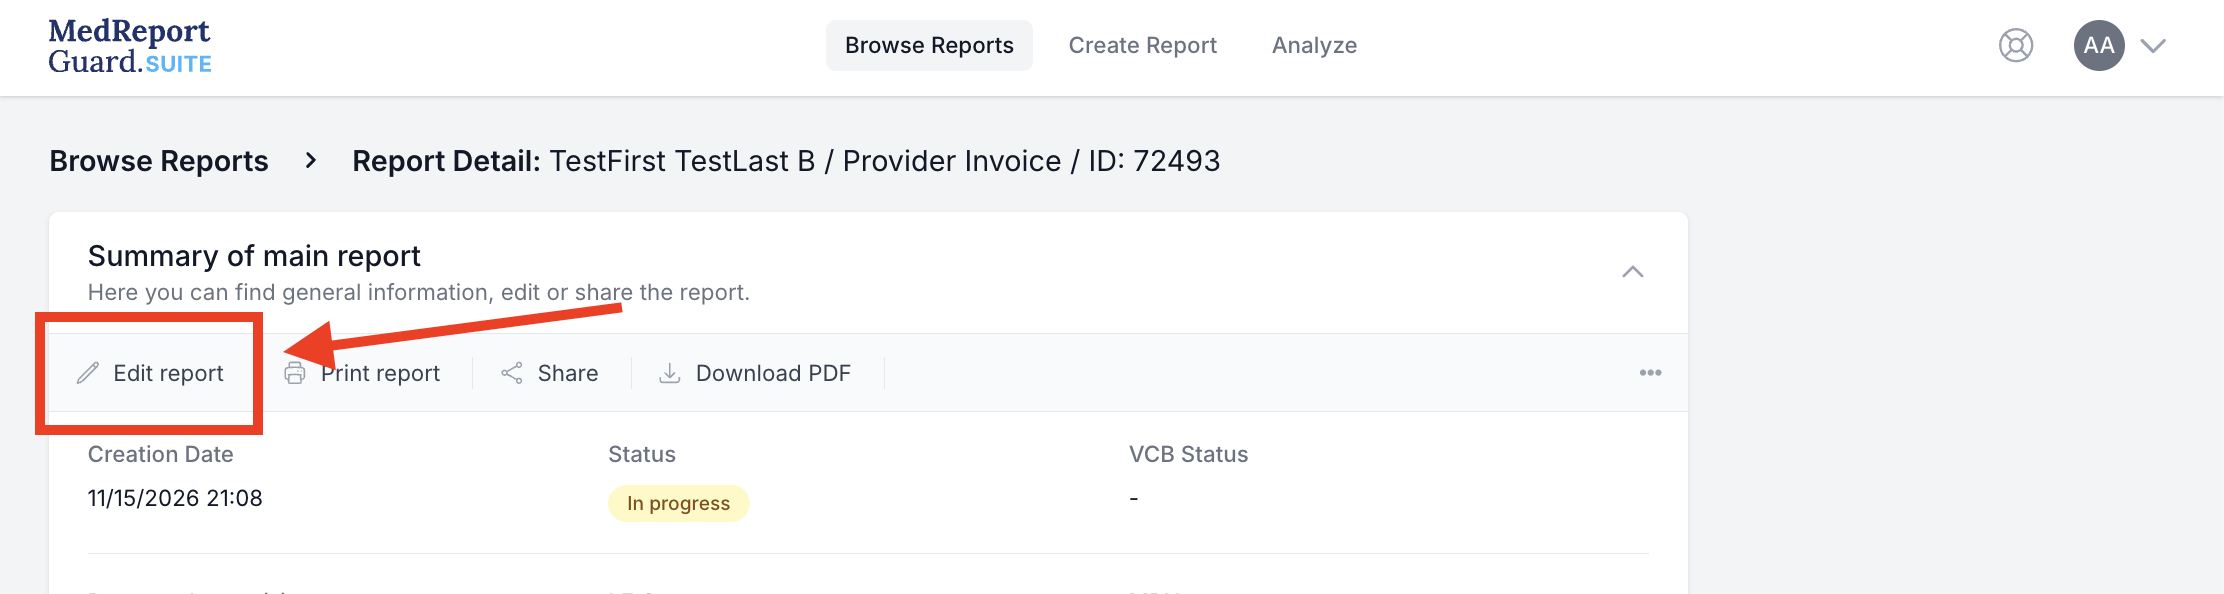
Step 8: Complete the Remaining Form Fields
Many of the form fields will already be complete, however some fields may need additional information in them:
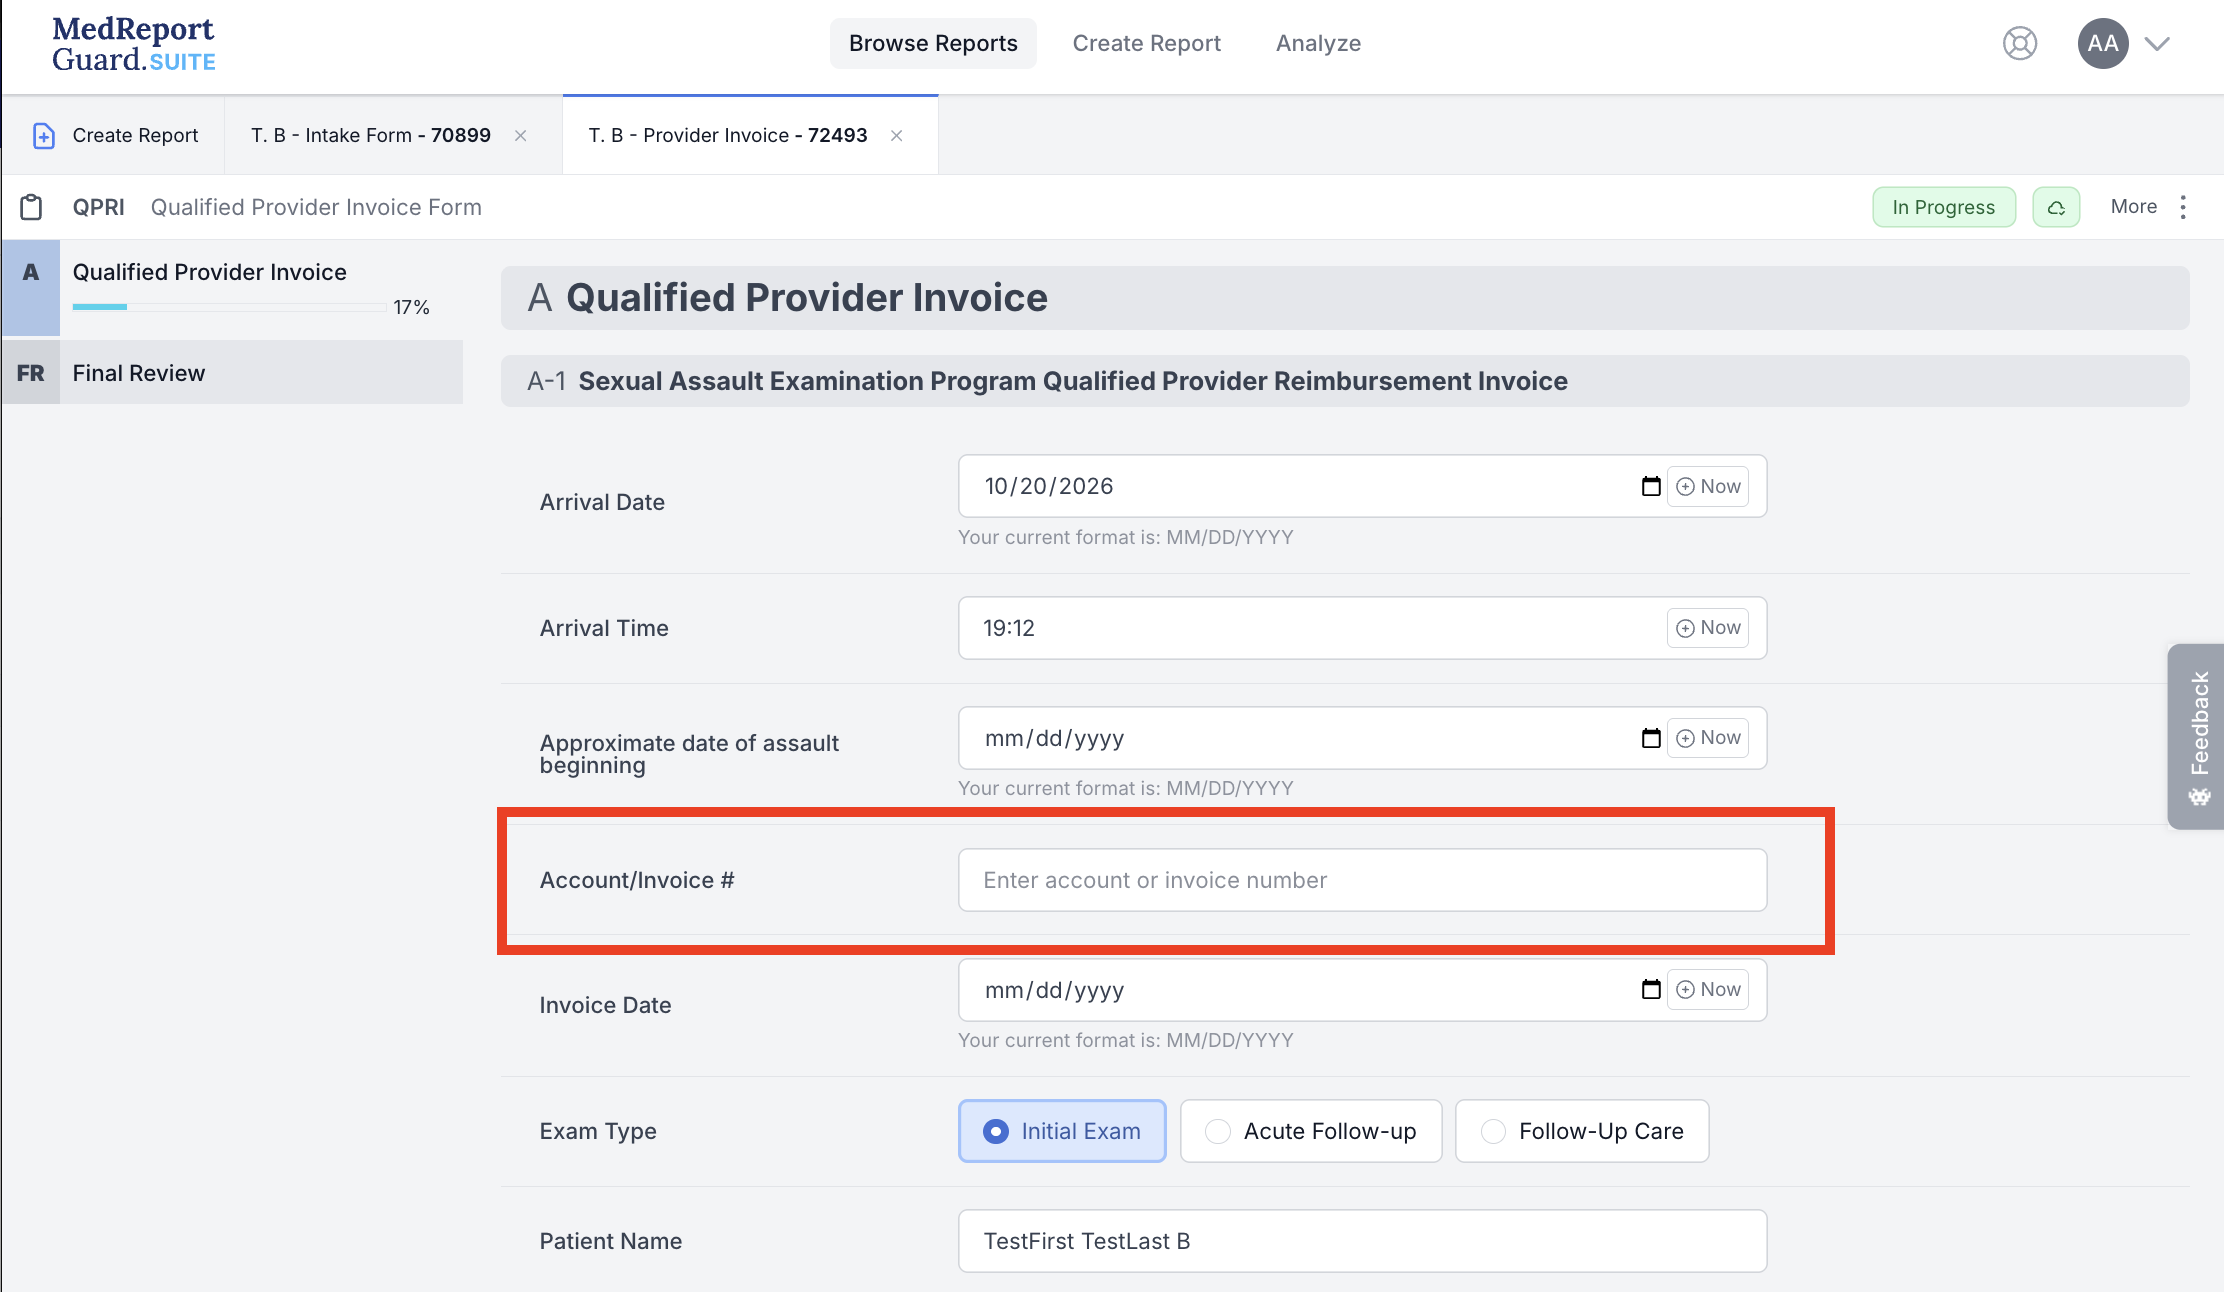
The Account/Invoice # should be the Iowa SAFE EIN, followed by the date and "-1", or "-2" if there are multiple on the same day.
Step 9: Navigate to the Final Review Section, Lock the Report
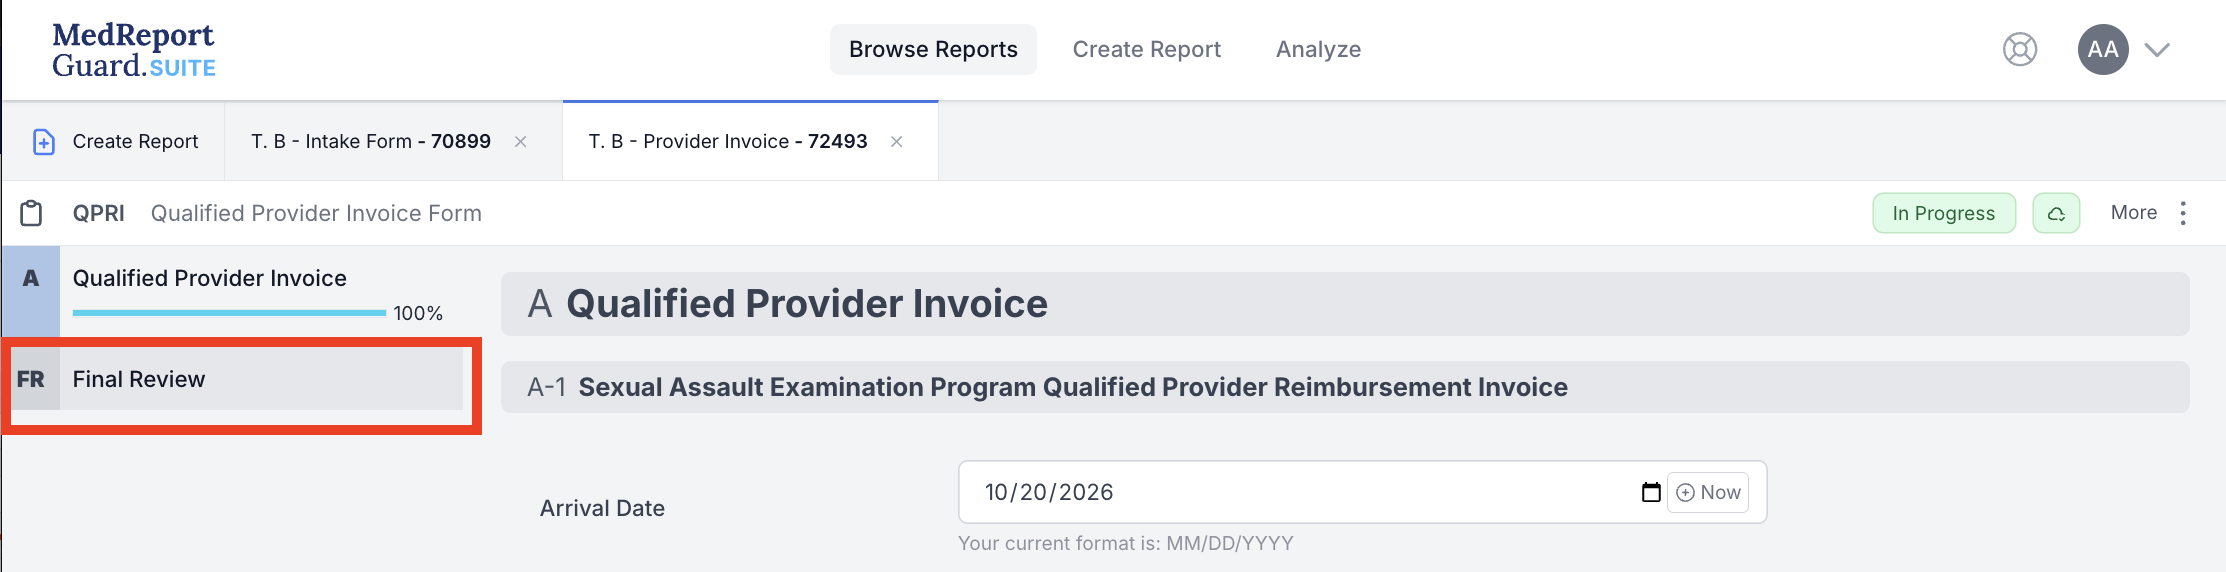
Navigate to the final review section by clicking "FR: Final Review"
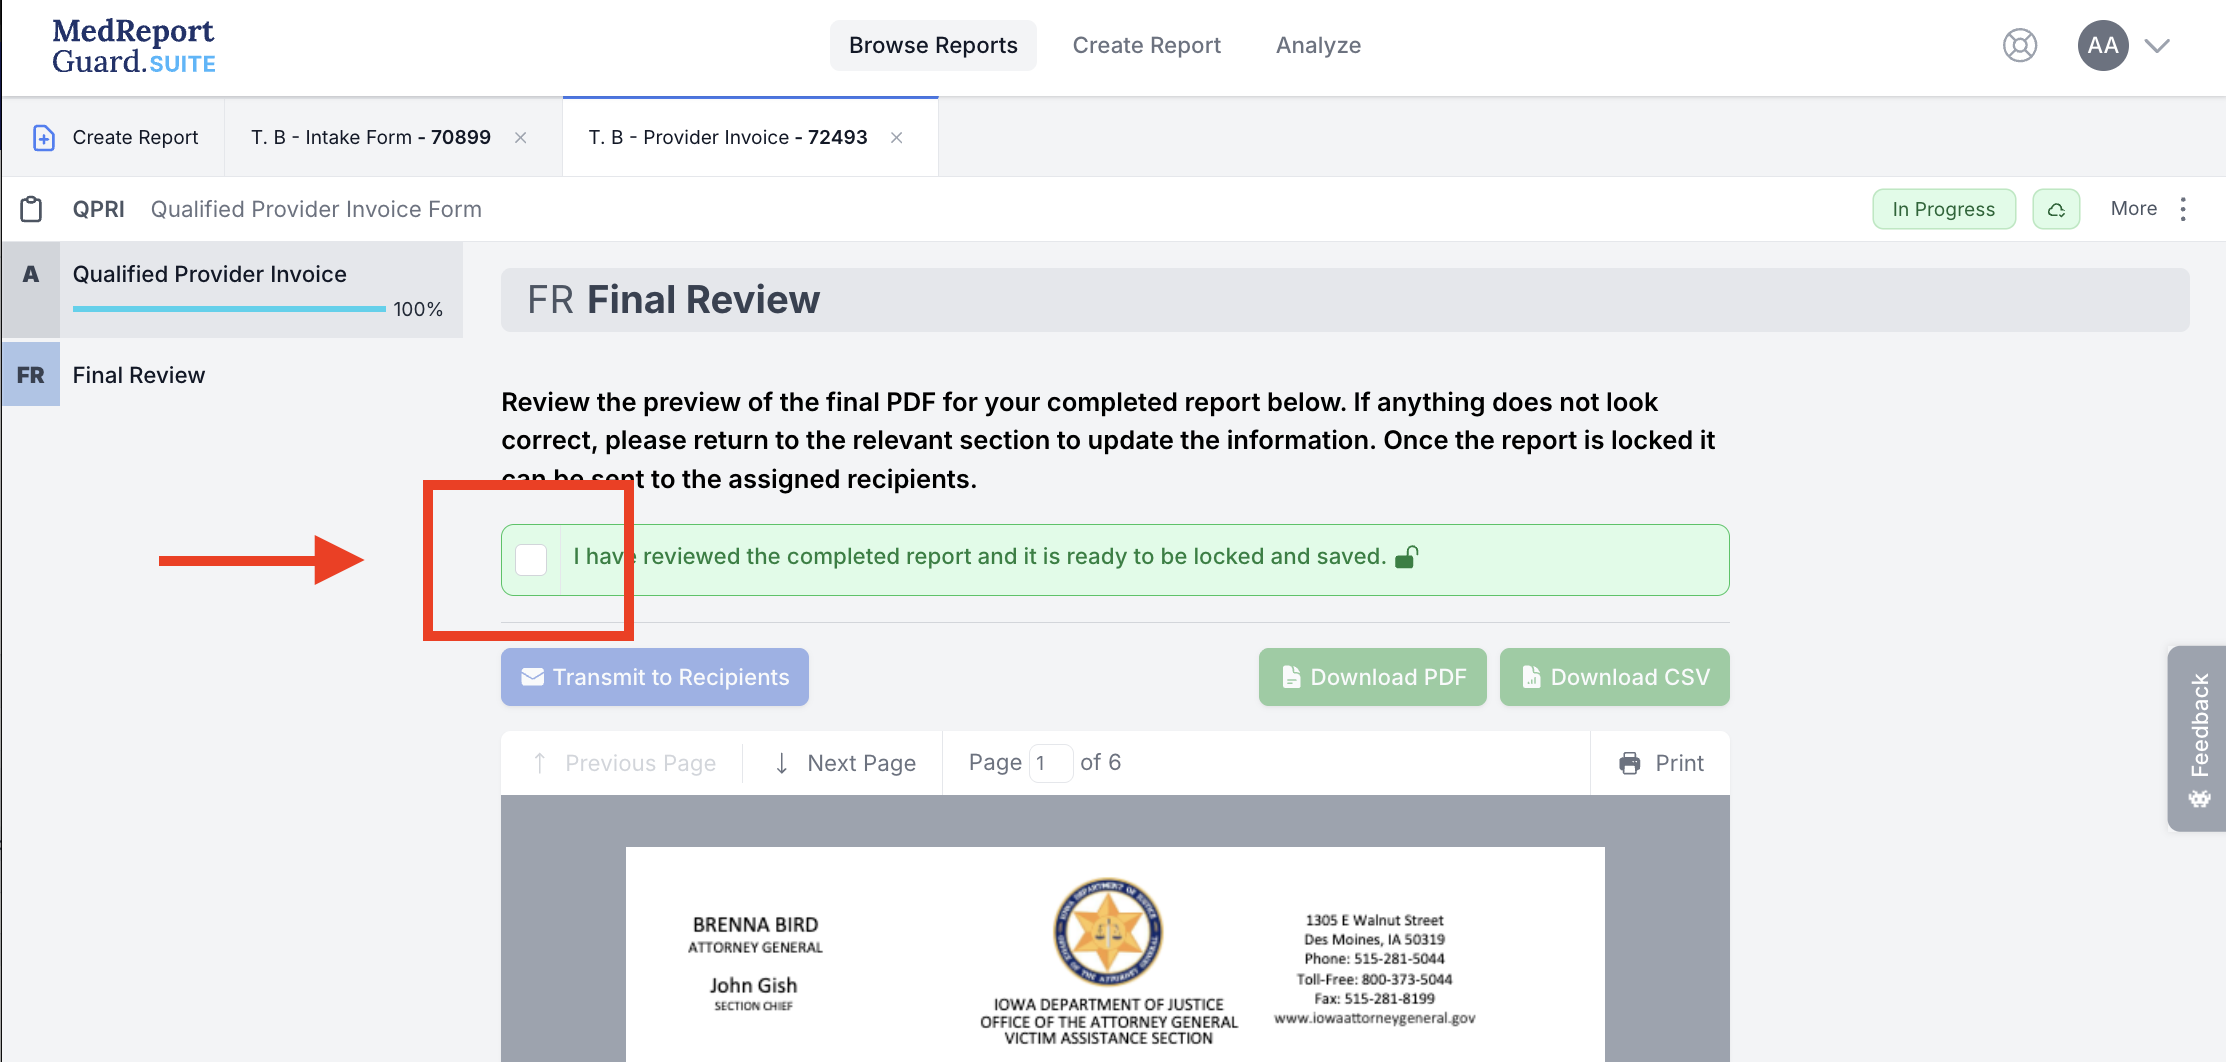
Locate and click the box to "Lock" the report
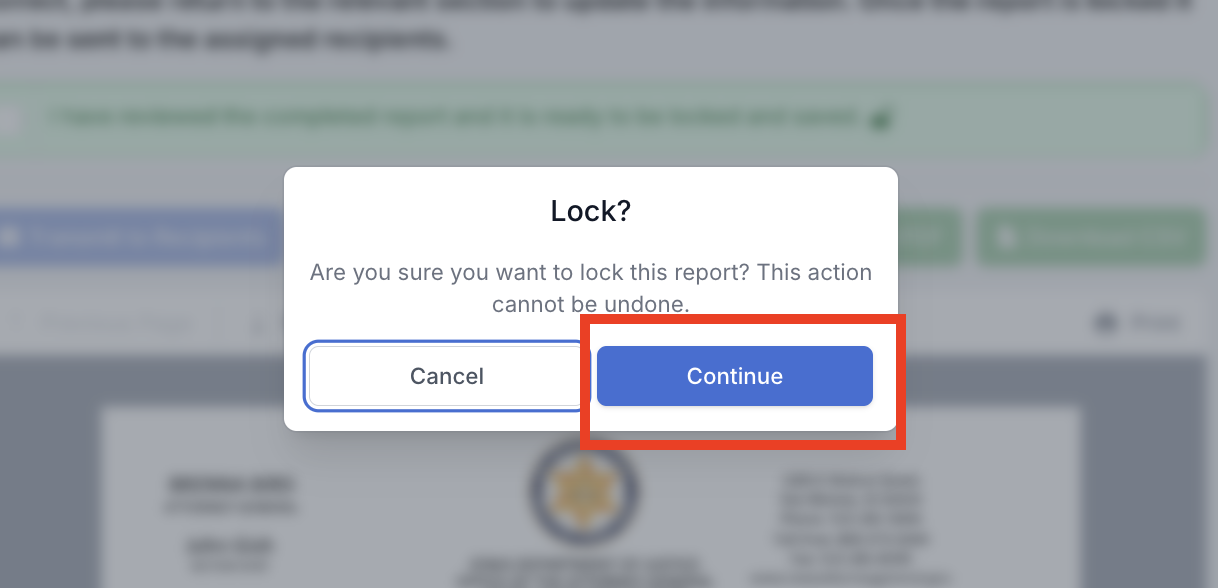
Click "Continue" to confirm locking the report:
Step 10: Transmit to Recipients
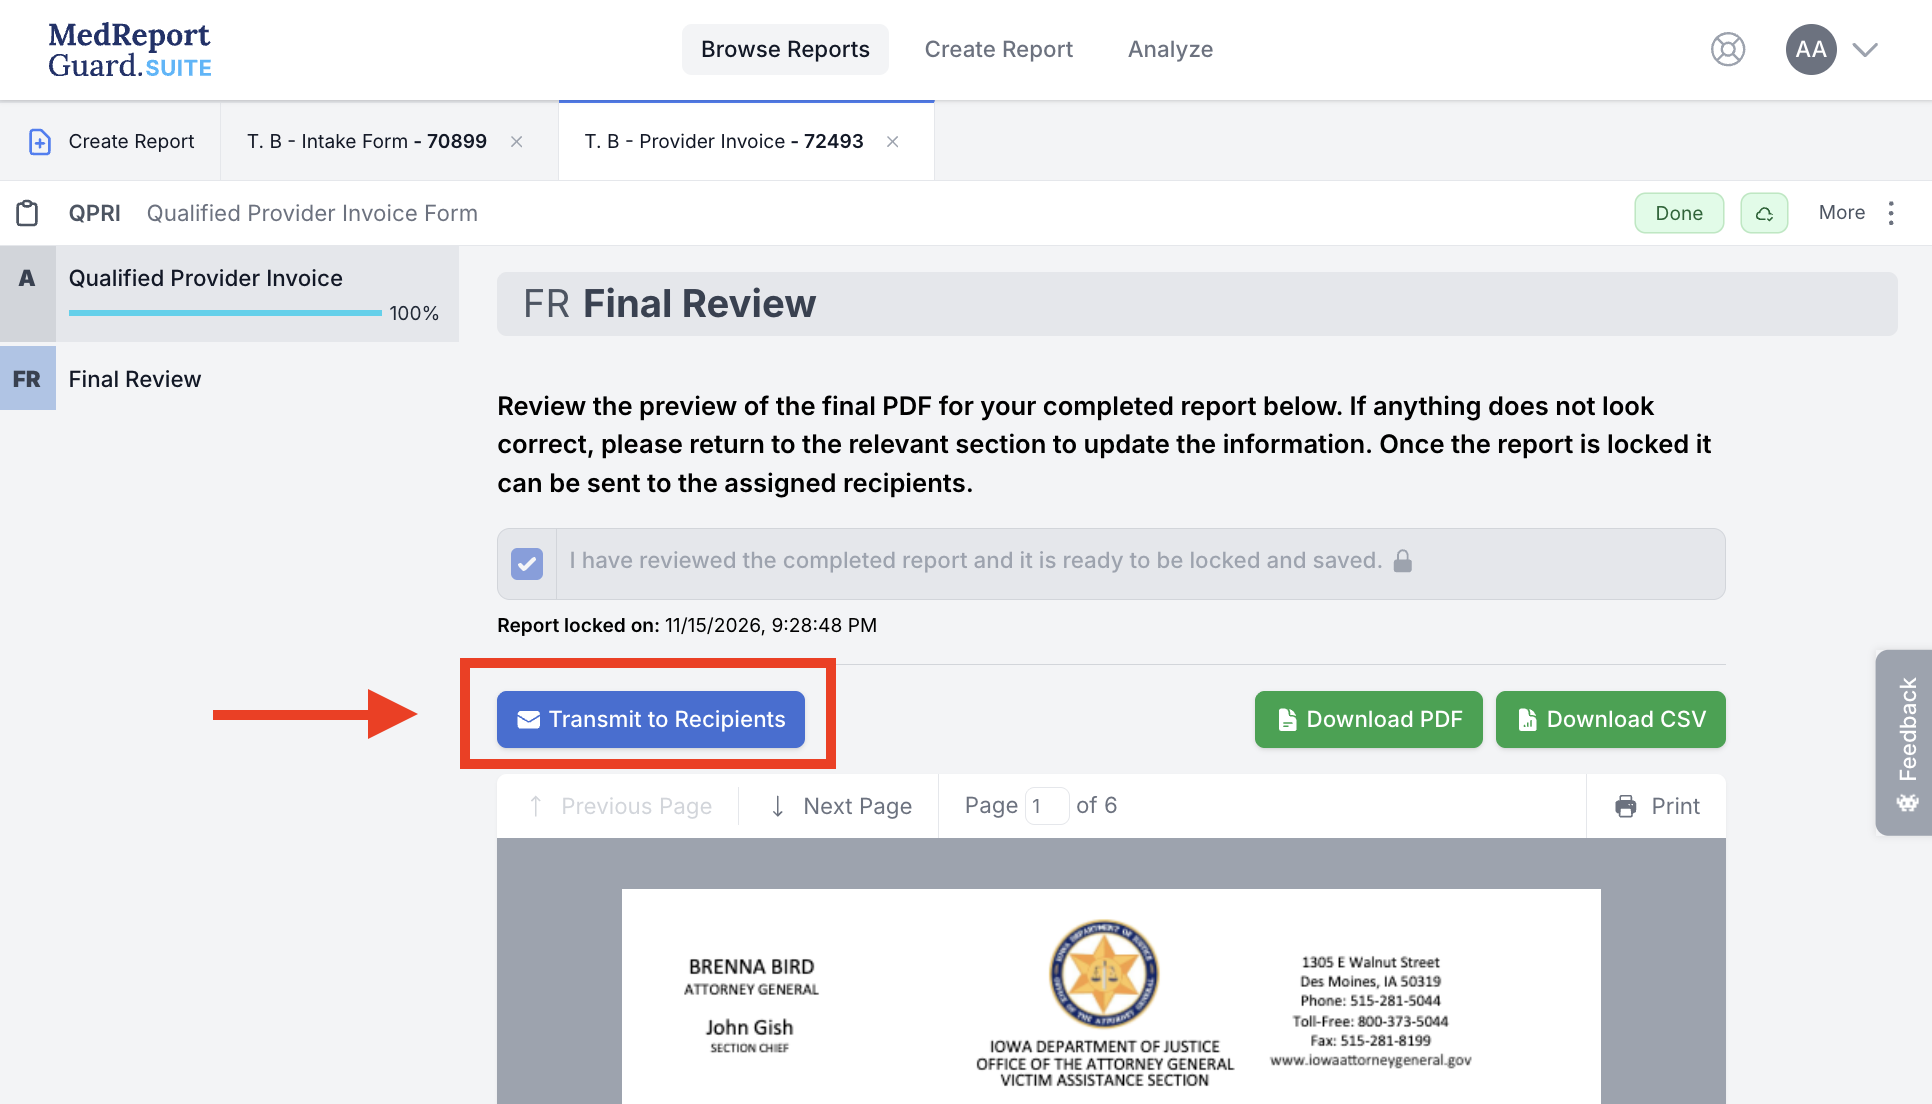
Click "Transmit to Recipients"
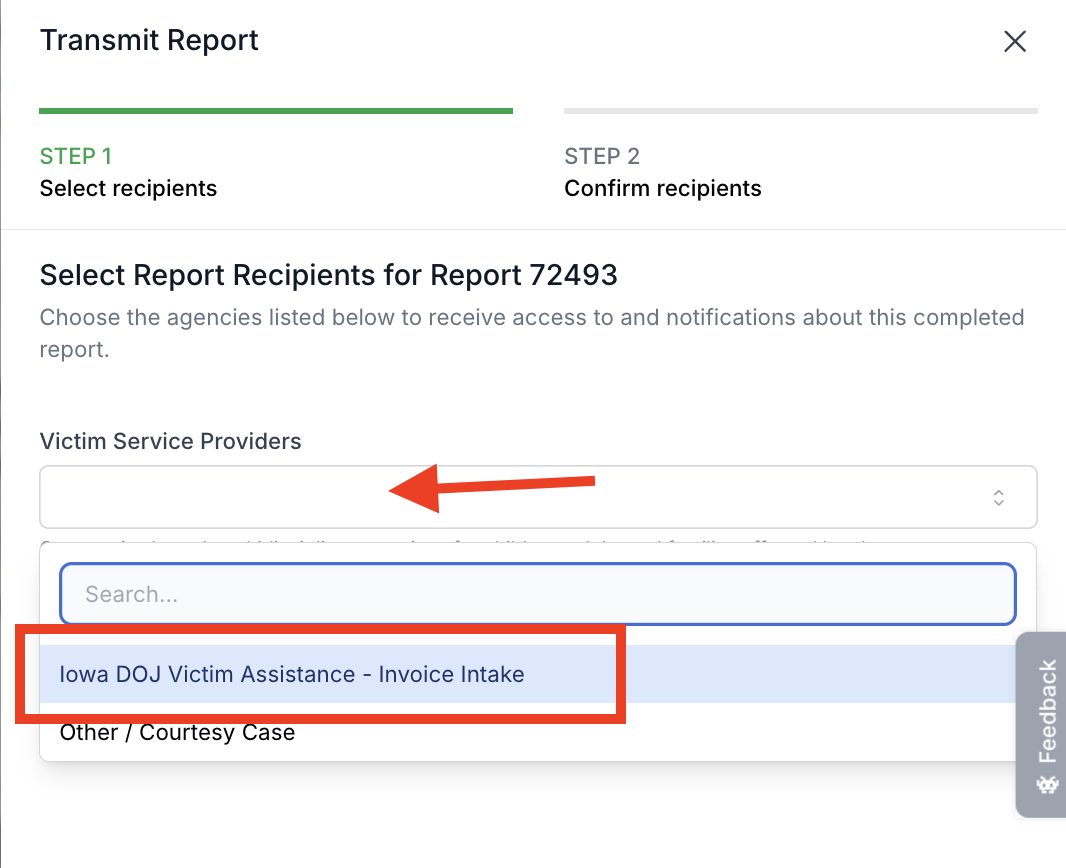
Under "Victim Service Providers", select "Iowa DOJ Victim Assistance - Invoice Intake". This will route the report to the appropriate processing team:
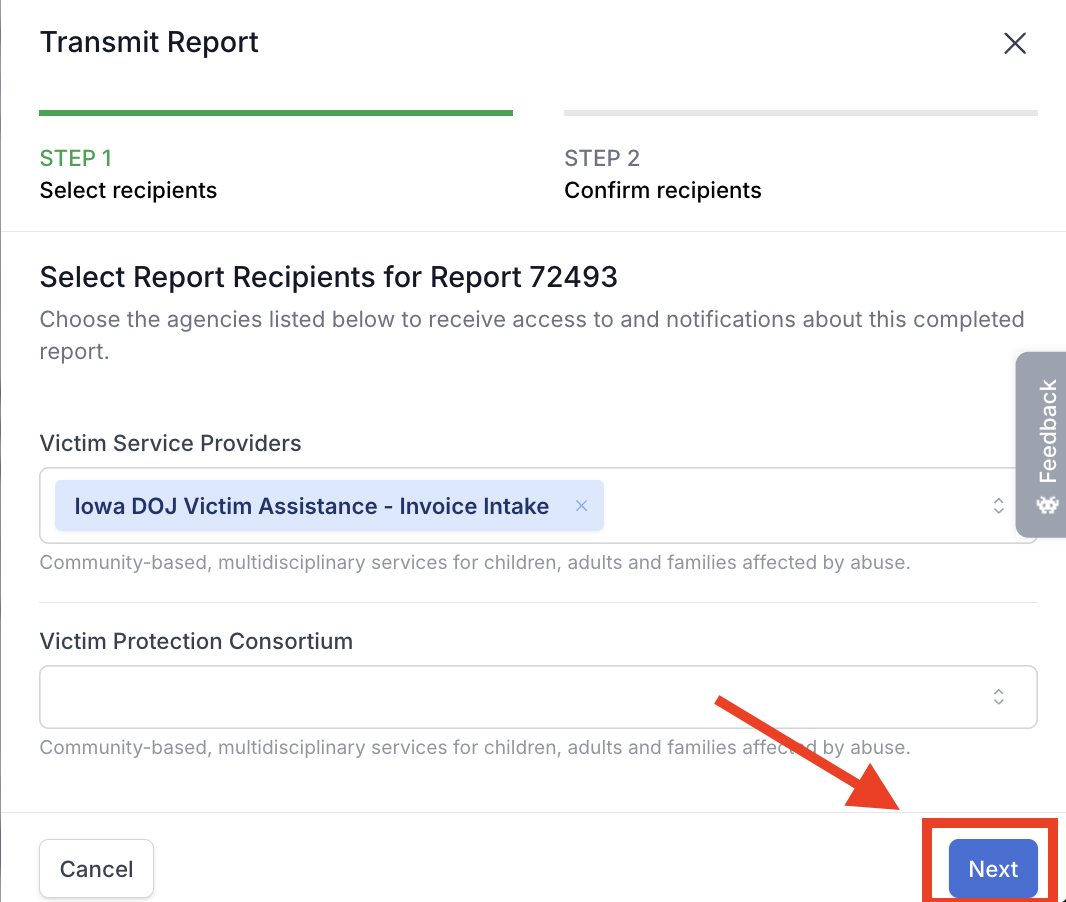
Once the intended recipient has been selected, click "Next"
And click "Confirm":
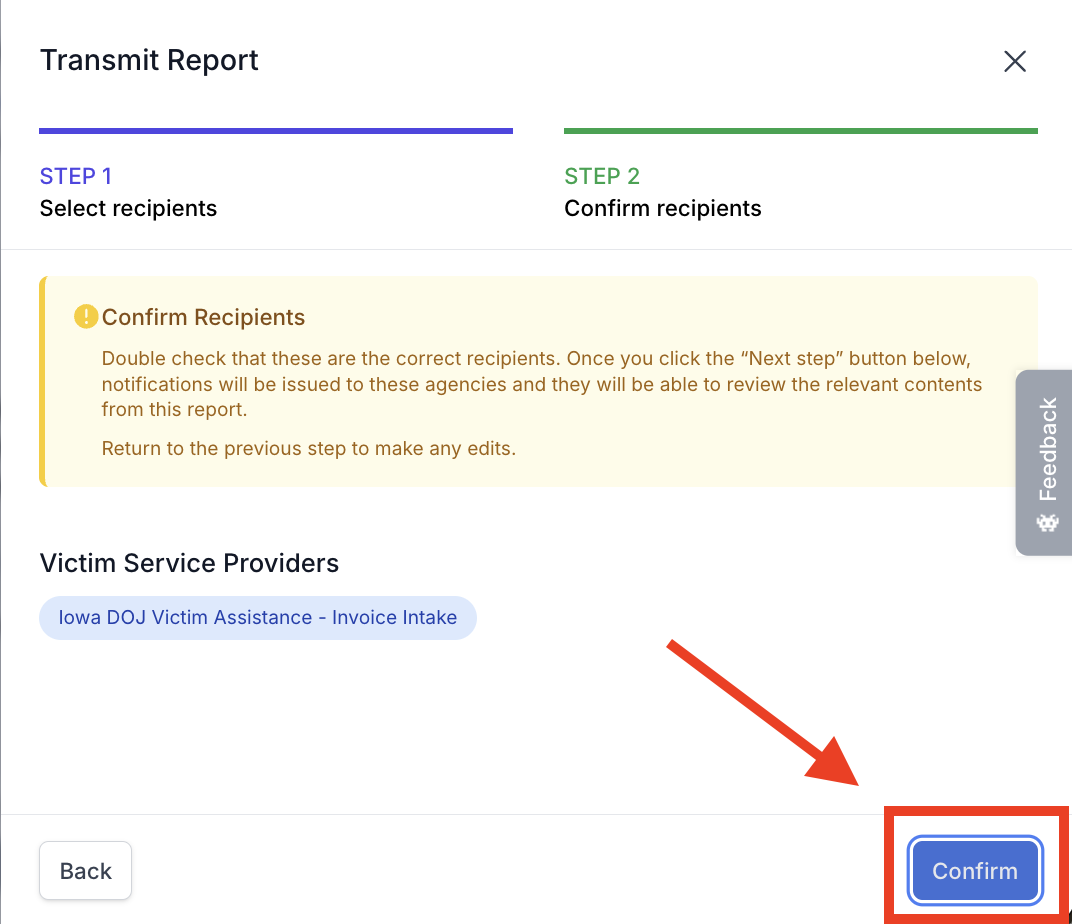
This will transmit the report directly to the program!
(Optional) Step 11: Confirm Transmission
We can confirm transmission by going back to the Browse Reports View, by clicking "Browse Reports":
Here you should see the newly created Provider Invoice with the "Status" column showing a lock symbol and the date, and a single dot in the "Shared" column:
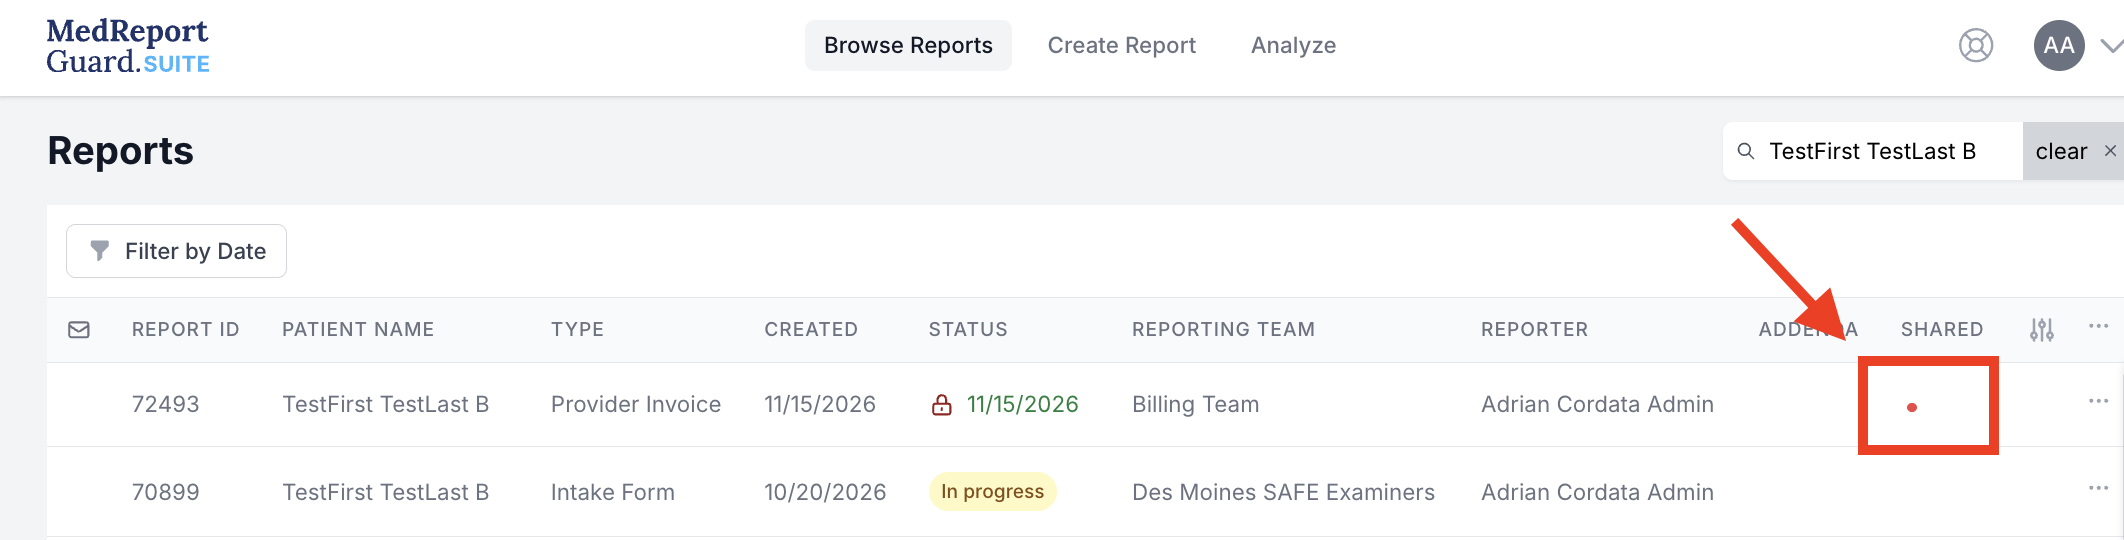
A Red color dot indicates it has not yet been opened, and a Green dot indicates it has been reviewed and opened by the receiving entity.